Final Assembly
Reliable automated assembly processes are a prerequisite for consistent quality. With our systems, you benefit from proven automation solutions for all assembly applications. They ensure continuous process and quality control and support parts handling - large or small, sorted, or unsorted.
Tried and tested in numerous installations around the world, our technologies guarantee 100% quality assurance and unlock significant potential for greater efficiency, ensuring a rapid return on investment.
Automation in the Door Line
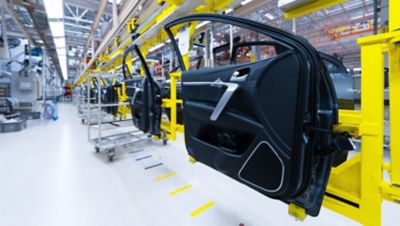
The use of fully automated in-line measurement is a key factor in ensuring high-quality, reliable door production and offers significant benefits. Automated assembly of seals, welding of seal ends, and inspection of their quality as well as component handling can be performed accurately and efficiently. This reduces the need for manual rework, improves production speed and consistency, and minimizes the risk of errors or defects in the final product.
Benefits
- Minimize manual rework
- Improve production speed and consistency
- Achieve valuable data for process optimization and quality control
- User-friendly software
- Identify production issues in time
- Features
Precise 3D robot guidance with minimum material usage
Highly flexible system configuration to any customer requirements
Robot interface for all common robot manufacturers
Solutions for “stop & go”, “moving-line” and “on-the-fly” processing
Download additional information
 asdf
asdf
MONO3D flyer en
- Filename
- flyer-mono3d-automotive-en.pdf
- Size
- 548 KB
- Format
 test123
MONO3D flyer de
- Filename
- flyer-mono3d-automotive-de.pdf
- Size
- 548 KB
- Format

MONO3D flyer cn
- Filename
- flyer-mono3d-automotive-cn.pdf
- Size
- 639 KB
- Format
Best Fit Component Alignment

Highly accurate robot positioning is essential for the correct assembly of different objects. Best fit component alignment with SHAPEMATCH3D is a highly flexible 3D robot guidance system that ensures uniform and customizable gaps, especially when installing windows, sunroofs, panoramic roofs, and more. The quality of the high-precision process is documented by a final measurement.
Benefits
- Compensate position deviations with 100% reliable component alignment
- Save costs & resources with low installation and maintenance efforts
- Full flexibility: Handle multiple car types and multiple component types in the same line
- Ensure process continuity: stable, robust, and fast robot guidance for constant and continuous processes in all ambient light conditions
- Features
- Technical data
Robot-guided component alignment for glass decking & panorama, front-end, and bumper mounting
Flexible use for “stop & go”, “moving-line” and “on-the-fly” processing
Robust construction suitable for robot mounting and rough conditions
Robot interface for all common robot manufacturers
1 to n sensor combinations for any part sizes and geometries
Typical measuring time of 250 ms or less
Accuracy of 0.2 mm
Bead Inspection
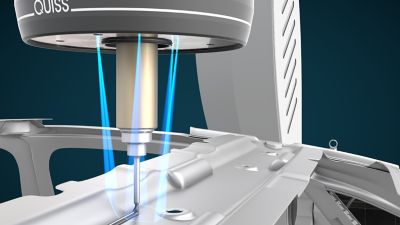
Increasing demands for product quality and, as a result, high-quality adhesive bonds are becoming ever more important in the automotive industry. With RTVision.3d from QUISS, it is now possible not only to measure the width, position, and continuity of the bead application but also its height. This provides insights into the applied material volume.
Benefits
- Easy to use and quick to install thanks to intuitive software
- Extrinsic calibration enables traceability to robot coordinates
- Maximum performance and precision with patented solution
- Inline monitoring for outstanding quality without additional cycle time
- Features
- Typical defects
- Technical data
Three-dimensional inspection for greater inspection quality
360° application coverage ensures 100% bead inspection
6x laser triangulation for maximum curve coverage
Laser class 2M: only basic safety level required
Robust and compact design for flexible adaption to any inspection task
Height deviations
Gaps
Position deviations
Width deviations
Robot speed up to 600 mm/s
Working distances of 85 mm to 245 mm
High-precision glue bead detection up to 0.1 mm
Download additional information
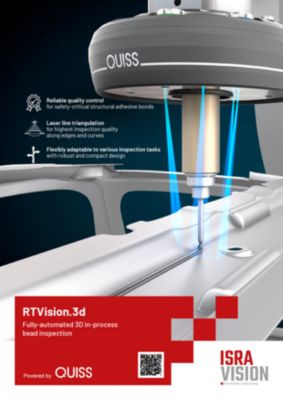
RTVision.3d [EN]
- Filename
- mvs-sfa-fl-rtvision-3d-en-2025-01.pdf
- Size
- 764 KB
- Format
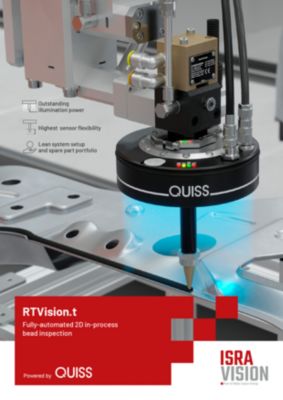 QUISS RTVision.t brochure en
QUISS RTVision.t brochure en
- Filename
- mvs-sfa-fl-rtvision-t-en-2024-12_web.pdf
- Size
- 737 KB
- Format
Cockpit Insertion

Robot-guided insertion of cockpits into the body ensures stable cycle times and cost-effective production with high flexibility. The same system can handle different vehicle types and cockpits. At the same time, the stationary sensors require little maintenance.
Benefits
- Full flexibility to handle multiple car types in the same line
- Minimal effort for preventive maintenance
- 100% perfectly mounted cockpits into the car body
- Features
- Technical data
Automatic insertion of the cockpit through
- stereo metric measurement of the cockpit on the rack and the inner cockpit’s bolt’s position
Automatic adjustment of the robot guidance
“Stop-&-Go” or “On-the-Fly” layout possible
Stationary sensor mounting
Simple and clearly structured GUI
Stereo sensors with measurement standoff: 100 to 5,000mm
Measurement accuracy: ± 0.1mm (depending on the field of view)
Measurement features: edges, holes, planes
Seat Insertion
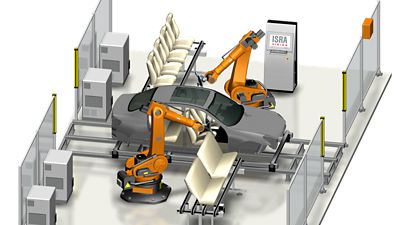
Manual insertion of vehicle seats in the body requires precision and strength from the operator, despite the aids available. This is especially the case when it is done in motion.
Automatic installation with 3D robot guidance sensors determine the 3D position of the vehicle openings, so that the robot can perfectly insert the seats in the vehicle with its gripper.
Robot-guided insertion of seats into the car body ensures stable cycle times and cost-effective production with high flexibility.
The same system can handle different vehicle types and seats. At the same time, the stationary sensors require little maintenance.
Benefits
- 100% perfectly mounted seats into the car body
- Full flexibility to handle multiple car types in the same line
- Minimal effort for preventive maintenance
- Easy-to-use software with graphical user interface
- Features
- Technical data
All measurements are independent of the color or reflection properties of the components
Placement based on online measurements
Intuitive user interface and can be used without any expert knowledge
Compatible with all common robot types
Suitable for stationary and robot mounting
Cycle time below 500ms
Efficient object position determination in 4 degrees = x, y, z and Rz
Low space requirements and ease of integration in confined spaces
Vehicle Marriage

The vehicle marriage - putting together the body, drive system and chassis - is a complex assembly process in which precision is everything.
The ISRA Inspection System replaces manual inspection practices. The intelligent multi-camera system is a nondestructive, non-contact, fast and flexible system based on VIVA technology for comprehensive inspection of completeness and position detection for safeguarding the “marriage” process.
There is no need to position the components accurately in advance, as VIVA comes with automatic object detection and component position correction as standard. It even reliably identifies and inspects objects that have been moved and turned, preventing complications in downstream process steps and considerably reducing costs.
Benefits
- 100% perfectly mounted chassis into the car body
- Unlimited flexibility and ease of use
- Placement based on online measurements
- Full flexibility to handle multiple car types in the same line
- Minimal effort for preventive maintenance
- Intuitive operation, understandable and fast diagnosis
- Features
- Technical data
“Stop and go” or moving « on the fly » configuration
Easy and transparent parameterization off all recognition and verification parameters for an easy operation.
All measurements are independent of the color or reflection properties of the components
Multiple image processing tools integrated
Integrated sequence control
Standardized user interface
Configurable applications
Car body Preposition: ± 20 mm
Accuracy: ± 0.3 mm to ± 0.5 mm
Measuring time: For each camera the acquisition and processing time is max. 350 ms
Wheel Mounting

Non-contact identification of wheels and break discs, accurate position detection, and high-precision guidance: our robot-guided wheel mounting system ensures robust and highly accurate processes, maintaining or even reducing machine cycle times and achieving maximum uptime.
With MiniPICK3D, manufacturers can automate wheel assembly safely and reliably, while remaining flexible for different vehicle types and wheels on the same line.
Benefits
- High-speed: scan time <1s
- Stable, robust, and fast robot guidance for continuous processes
- Teach-from-Scan to get a more accurate model of the real part
- Features
- Technical data
Measurement of wheel position including orientation
Measurement of break disc position including the corresponding orientation
Robot-mounted sensor including single-shot-calibration
Multi-stereo-vision: 4 cameras, 2,3 MP
Random dot pattern
Fuel & Power Insertion
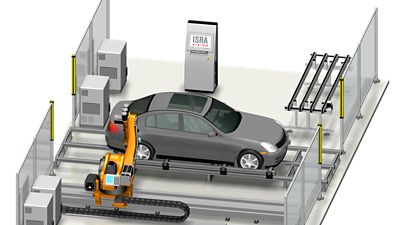
Robot-guided opening of the fuel cap and detection of the filling position or the charging plug allows the vehicle to be refueled or charged directly in the line in a cycle-time-optimized manner. The color of the vehicle has no effect on the measurement performance.
Benefits
- Minimal effort for preventive maintenance
- Simple and clearly structured GUI
- 100% Fuel insertion on all cars
- Full flexibility to handle multiple car types on the same line
- Features
- Technical data
Stereometric measurement of cap opening position for robot-guided fuel insertion or battery charging
Moving configuration «On the fly»
Required preposition of the car body ± 20 mm
Accuracy: ± 0.2 mm to ± 0.3 mm
Measurement time: < 1 sec.
All body colors
Stand off: 300-350 mm
Gap & Flush
Our Perceptron non-contact gap and flush solution for final assembly creates an objective dimensional quality gate that ensures every vehicle leaving your facility achieves the highest standards for fit and alignment. A fully automated solution measures the relationship between mating parts and directs your personnel where to adjust or what to correct in the manufacturing process.
Benefits
- Automate manual, subjective operations
- Reduce customer complaints and warranty claims for road, wind noise and water leaks
- Guide fitters to only adjust where needed
- Closed-loop feedback with other stations to optimize the build process
- Features
Moving line or stop station options
Repeatable, accurate measurements on glass, chrome, polycarbonate, carbon fiber, painted metal, and more
Reliably measure gaps less than 1mm or gaps that have been partially filled with noise reduction materials
Download additional information

AutoFit brochure en
- Filename
- brochure-isra-perceptron-autofit-automotive-en.pdf
- Size
- 1008 KB
- Format

HelixHD brochure de
- Filename
- brochure-helixhd-de.pdf
- Size
- 277 KB
- Format
Production Analytics
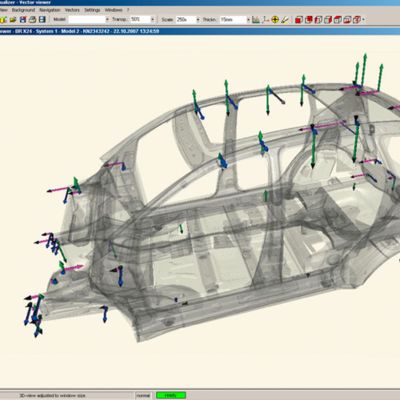
Ensure that your quality standards are met: With comprehensive visualization, analysis, reporting, and alerting tools, IQ-VIS enables live monitoring of ongoing production. The database system collects, consolidates, aggregates, and analyzes all results from the various measurement systems throughout a production facility.
IQ-VIS is an intelligent toolbox for a wide range of users, such as maintenance, operations, and management. The client-server architecture allows data to be accessed both locally and across plants.
This makes production more transparent and allows emerging trends to be visualized in the shortest possible time. Negative influences on product quality can be addressed immediately before quality problems cause additional costs.
Benefits
- Control center function for real-time status visualization in the systems
- Analysis function for conducting special comparisons, e.g. correlation analysis
- Reporting function for automatically generating customer-specific reports


