Body Shop
Ensure smooth control of all process steps with the automated handling of all components - large or small, sorted, or unsorted. Reduce your quality costs with reliable inspection solutions.
By integrating our systems into your process, you can fully automate a wide range of part variations and easily maintain specified tolerance limits. This significantly improves process quality and ensures that industrial robots can be used with ease.
With over 35 years of experience in the industry, we have developed a deep understanding of our customers' requirements and have optimized our systems specifically for body shop applications.
Inline / Atline / Offline-Gauging

Perceptron Industrial Metrology solution for the automotive body shop enables you to contain, correct, verify, and control manufacturing quality immediately — on every part — at full production speed without removing the part from your manufacturing process.
High-volume, complex manufacturing processes can change quickly and unexpectedly. By containing problems when they occur, and accumulating data on every part, you can proactively detect and monitor production trends before they hit the crisis stage or cause downtime.
Our solutions can be installed inline, atline or offline to meet your measurement requirements.
Benefits
- Reduce process variation
- Improve production quality
- Shorten product launch times
- Lower manufacturing costs
- Features
- Typical defects
- Technical data
Statistical Process Control (SPC) and Geometric Dimensioning & Tolerances (GD&T) Reporting
Accuracy Traceability to ISO10360 Standards
Export & Import data to other devices
IP67 Sensor Technology
Holes & slots
Surfaces
Threaded studs
Feature relationships
Robotic or structure mounting options
Supports all robot brands
Measurements in 2.5 secs
Download additional information
 asdf
asdf
AccuSiteHD Tracker Flyer [EN]
- Filename
- mvs-sfa-fl-accusite-en_2025-11_web.pdf
- Size
- 1 MB
- Format
 asdf
asdf
Industrial Metrology Flyer [EN]
- Filename
- Industrial-Metrology-flyer-2025-05-web.pdf
- Size
- 1 MB
- Format
Car Position Measurement

Robots in the production can only complete their task accurately with a reliable detection of the car body position in the cell.
The ISRA VISION Car Position Measurement (CAPMES) system is the industry standard on the market: it is easy to set up and ensures reliable, precise 3D recognition of the body position and orientation in stop & go operation or line tracking in the cell based on a combination of multiple cameras directed at certain features of the car body (e.g. holes, edges, corners) from various directions.
The 3D position of the body detected by the system is used to provide the off-set data to guide robots accurately in a downstream processing step. As a result, car body tolerances and mechanical position deviations can be compensated perfectly and a wide range of car body types can be accommodated on a single line.
Benefits
- Fast and precise measurement of car body position for accurate robot guidance
- Full flexibility for handling multiple car types in single production line
- Reduced cycle time compared to mechanical fitting systems
- Reliable function even under harsh conditions with built-in redundancies
- Maximum uptime with automatic failed measurement recovery of alternate feature allowance
- Features
- Technical data
Reliable feature detection with HDR image capturing
Automatic calibration check and recalibration
Easy-to-use software with graphical user interface
Stop & go operation or line tracking
Compatible with all common robot types
Measuring time < 1 s with 4 cameras
Typical measuring accuracy of more than +/- 1 mm
Protection flaps for camera and lamps
Pick & Place, Depalletizing

Optimize production efficiency while reducing costs: ISRA provides process-integrated solutions for contact-free identification, location recognition, and high-precision joining and monitoring of components throughout the process chain.
Compatible with all common robot types, ISRA’s flexible robot guidance systems ensure reliable production processes and automation for enhanced efficiency. The sensors are designed especially for the harsh production environment, withstanding shocks, acceleration, and contamination.
When part geometries are changed or new components integrated, for example, new component shapes can be configured in just a few hours. This allows the systems to deliver excellent process reliability.
Benefits
- Excellent process reliability
- Reliable production processes
- Ready to use in hours with any robot
- Online-Teaching for a quick and easy handling of system during operation without loss of production time
- Features
- Technical data
- Detection of all visible objects using trained contours
Intuitive user interface and can be used without any expert knowledge
New component shapes can be configured in just a few hours
Compatible with all common robot types
Suitable for stationary and robot mounting
Image acquisition and calculation < 0.5 sec
Obtains accurate data with measurement accuracies of +/- 0.5 mm in X, Y (Std. resolution)
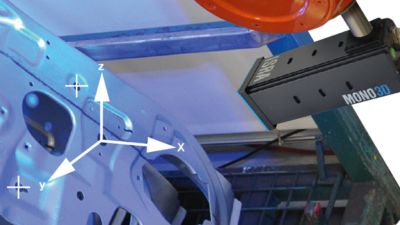
Efficient object position determination in 4 degrees = x, y, z and Rz
High flexibility with measurement distances from 2000mm to 4000mm
Low space requirements and ease of integration in confined spaces
Bead & Seam Inspection

When it comes to safety, the structural bonding of the car body is crucial.
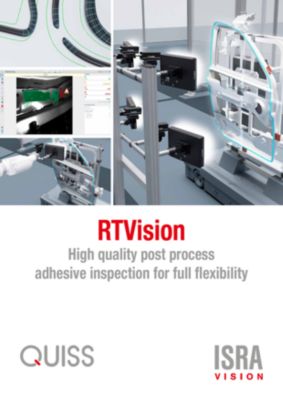
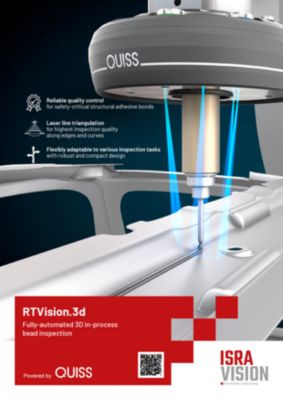
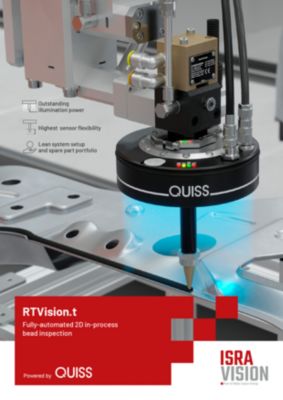
Our bead inspection systems reliably detect interruptions, faulty geometry, or position deviations -– directly inline or offline, depending on the application and requirements. The systems are perfectly coordinated and integrated into your line with optimized cycle times. The result is 100% production quality. Rework and scrap can be significantly reduced.
Automated bead repair is available for all RTVision sensors. During application, the bead is accurately measured, and any gaps are reported to the application or robot control system. In a second pass, these gaps are closed -– accurately, without overlap and unwanted extra application.
Benefits
- Higher production quality
- Increased productivity with automated bead repair
- Lower your total cost of ownership: Save costs and adhesive material by reducing rework and scrap parts
- Features
- Typical defects
- Technical data
Inspection of all conventional adhesive and sealant application types and colors
Inspection of the continuity, width, position, and height of adhesive applications
Stationary or gripper-integrated inspection
Easy to retrofit in existing systems
Different system versions available depending on available space and application
Gaps
Width deviations
Position deviations
Height deviations
Accuracy in gaps: ± 0.5 mm
Accuracy in position: ± 0.1 mm
Accuracy in width: ± 0.1 mm
Download additional information

QUISS RTVision brochure en
- Filename
- brochure-quiss-rtvision-automotive-en.pdf
- Size
- 495 KB
- Format

RTVision.3d [EN]
- Filename
- mvs-sfa-fl-rtvision-3d-en-2025-01.pdf
- Size
- 764 KB
- Format
 QUISS RTVision.t brochure en
RTVision.t [EN]
QUISS RTVision.t brochure en
- Filename
- mvs-sfa-fl-rtvision-t-en-2024-12_web.pdf
- Size
- 737 KB
- Format
Best Fit Joining Processes
To achieve perfect results in complex manufacturing processes, robots and components must be optimally aligned. At the same time, process continuity is essential, even in difficult environments and conditions, with various car types in the same line.
The SHAPEMATCH3D sensor system determines the position and orientation of surfaces of any shape. The robot path is adjusted according to the detected deviations. Mechanical position deviations can be perfectly compensated, allowing a wide range of car types to be produced on a single line.
Through its versatile software functions, the cost-effective automation solution can be integrated into existing systems with little effort, regardless of the robot manufacturer and model.
Benefits
- Compensate position deviations with 100% reliable component alignment
- Save costs & resources with low installation and maintenance efforts
- Ensure process continuity: stable, robust, and fast robot guidance for constant and continuous processes
- Full flexibility: Handle multiple car types in the same line
- Features
- Technical data
Mobile and stationary robot guidance for door insertion
Flexible use for “stop & go”, “moving-line” and “on-the-fly” processing
Robust construction suitable for robot mounting and rough conditions
1 to n sensor combinations for any part sizes and geometries
Works in all ambient light conditions
Robot interface for all common robot manufacturers
Measurement time: typ. <250ms
Repeatability: < ±0.02 mm
Forming and Piercing

The system enables high-precision forming and piercing operations by measuring customer-specific features such as holes, edges, corners, surfaces, etc. of the vehicle to provide the corresponding robot offsets. Just before the robot performs the forming and piercing process, its position can be determined with high accuracy and corrected if necessary to achieve maximum process accuracy.
Benefits
- Works in all ambient light conditions
- Reliable results with high precision
- Short set-up times: Robot interface for all common robot manufacturers
- Features
- Technical data
Product reference for robot vision tasks
Flexible use for “stop & go”, “moving-line” and “on-the-fly” processing
Robust construction suitable for robot mounting and rough conditions
1 to n sensor combinations for any part sizes and geometries
Protection flaps for sensor
Welding protection glasses
Typical measuring time of 250 ms or less
Accuracy of 0.2 mm
Parts Positioning

Process-integrated measurement of customer-specific features such as holes, edges, corners, surfaces, etc. of the vehicle and determination of corresponding robot offsets: The system is suitable for managing a wide range of downstream production steps such as welding, soldering, riveting, stamping, joining, etc.
The precise pick-and-place process protects the component and the car body, prevents them from being damaged, and ensures correct placement in the defined position.
Benefits
- Compensation of mechanical position deviations
- Optimum position detection for flexible, high-precision robot guidance
- Robot interface for all common robot manufacturers
- Simple-to-use software
- Features
- Technical data
Precise 3D robot guidance with minimum material usage
Highly flexible system configuration to any customer requirements
Wide spectrum of volumes covered, from a few mm³ to several m³
System set ups for “stop & go”, “moving-line” and “on-the-fly” processing
SHAPEMATCH3D or MONO3D system
Typical measuring time of 250 ms or less for SHAPEMATCH3D
Accuracy of 0.2 mm for SHAPEMATCH3D
Gap & Flush

The fit and finish of a vehicle start in the body shop. Taking consistent and accurate gap and flush measurements on every car you manufacture allows you to identify and address alignment issues and reduce the likelihood of costly recalls or customer complaints due to road, wind noise, door closing effort, gas millage, and water leaks.
Overall, measuring fit and finish is an essential part of your manufacturing process to ensure a high-quality product leaves the body shop.
Benefits
- Automated, objective measurements
- Find problems faster to reduce costs with less labor, warranty, and scrap
- 100% quality traceability
- Increase process efficiency with closed-loop feedback to automated panel loading stations
- Features
Non-contact measurement
Supports collaborative and industrial robots
Moving line or stop station configurations
Each gap & flush measurement is optimized with robot position and sensor orientation
Can be combined with our automated panel loading station for two systems in one
Download additional information

AutoFit brochure en
- Filename
- brochure-isra-perceptron-autofit-automotive-en.pdf
- Size
- 1008 KB
- Format

HelixHD Sensor Flyer [EN]
- Filename
- mvs-sfa-fl-helix_hd-en_2025-10_web.pdf
- Size
- 634 KB
- Format


