Paint shop
Boost customer satisfaction by increasing the degree of automation in your painting processes. You will also benefit from increased process reliability and outstanding quality.
As paint shop automation advances, ISRA VISION's highly flexible robot guidance systems are your key to higher product quality and more efficient use of robots.
Our vision systems are specifically designed for position and location detection, paint and surface inspection, and process monitoring. They ensure robust, highly automated processes and guarantee maximum product quality.
PVC seam inspection

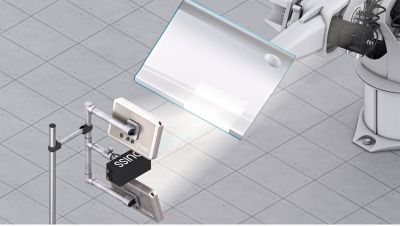
Reliable PVC seams are essential to ensure high-quality results in vehicle production. RTVision is a flexible solution that can be perfectly tailored to different requirements. The system is particularly suitable for paint applications with large coverage areas. In these applications, RTVision reliably detects all PVC seam interruptions and deviations in width and position. The result is 100% quality throughout the production process. It achieves excellent contrast ratios even at long working distances and in stationary solutions.
Benefits
- Higher production quality
- Increased productivity with automated bead repair
- High productivity levels
- Lower your total cost of ownership: Save costs and adhesive material by reducing rework and scrap parts
- Features
- Typical defects
- Technical data
- Inspection of all conventional adhesive and sealant application types and colors
- Inspection of the continuity, width, and position of PVC seams
- Gaps
- Width deviations
- Position deviations
- Accuracy in gaps: ± 0.5 mm
- Accuracy in position: ± 0.1 mm
- Accuracy in width: ± 0.1 mm
Download additional information
 asdf
asdf
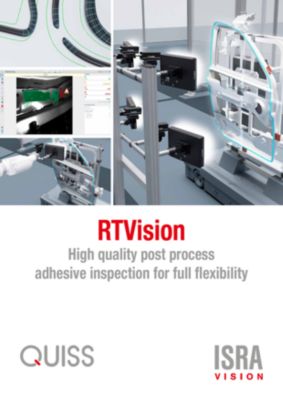
QUISS RTVision brochure en
- Filename
- brochure-quiss-rtvision-automotive-en.pdf
- Size
- 495 KB
- Format
 test123
RTVision brochure de
- Filename
- brochure-quiss-rtvision-automotive-de.pdf
- Size
- 497 KB
- Format

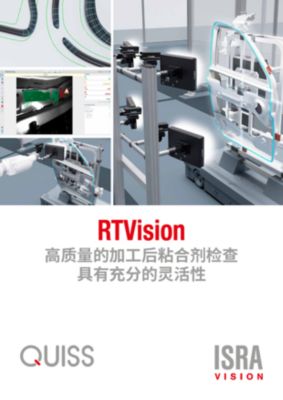
QUISS RTVision brochure cn
- Filename
- brochure-quiss-rtvision-automotive-cn.pdf
- Size
- 623 KB
- Format
Car position measurement

Robots in the production can only complete their task accurately with a reliable detection of the car body position in the cell.
The ISRA VISION Car Position Measurement (CAPMES) System is the industry standard on the market: it is easy to set up and ensures reliable, precise 3D recognition of the body position and orientation in stop & go operation or line tracking in the cell based on a combination of multiple cameras directed at certain features of the car body (e.g. holes, edges, corners) from various directions.
The 3D position of the body detected by the system is used to provide the off-set data to guide robots accurately in a downstream processing step. As a result, car body tolerances and mechanical position deviations can be compensated perfectly and a wide range of car body types can be accommodated on a single line.
Benefits
- Fast and precise measurement of car body position for accurate robot guidance
- Full flexibility for handling multiple car types in single production line
- Reduced cycle time compared to mechanical fitting systems
- Reliable function even under harsh conditions with built-in redundancies
- Maximum uptime with automatic failed measurement recovery of alternate feature allowance
- Features
- Technical data
- Reliable feature detection with HDR image capturing
- Automatic calibration check and recalibration
- Easy-to-use software with graphical user interface
- Stop & go operation or line tracking
- Compatible with all common robot types
- Measuring time < 1 s with 4 cameras
- Typical measuring accuracy of more than +/- 1 mm
- Protection flaps for camera and lamps
Cosmetic sealing & tool inspection box
Different car models and complex parts geometries produced on the same line require precise robot guidance for high-quality application of beads. The accuracy of the robot applying the bead significantly increases the quality of the time-consuming sealing process for roofs, doors, hoods and flaps.
The robot-mounted Q-GAGE3D sensor system determines the position and orientation of part contours for the application of fine and visible seams. The position deviations detected are used to accurately guide robots in the seam application.
An additional gap check can be integrated prior to applicating the seam to further ensure the precise process. The Tool Inspection Box (TIB) automatically checks the nozzle for damage after each application to avoid scrap and damage to the car body. The result is consistent quality, especially for all relevant visible seams.
Benefits
- Reproduceable application of bead material within exact tolerances
- Full flexibility for handling multiple car types in single production line
- Highly precise application of beads significantly increases productivity and fulfills the high demands in function, quality, and aesthetic
- Automated teaching process reduces onsite commissioning and the integration time for new parts
- Reduced preventive maintenance requirements
- Features
- Technical data
- High speed image processing on integrated FPGA
- Path correction software with almost NO Teach-In and Re-Teach Effort
- Sophisticated Time Synchronization between Robot and Sensor
- Scan frequency up to 500Hz for robot speed of approx. 600mm/s possible
- Measuring Principle: Laser Line Triangulation
- Fast TCP/IP interface to send robot poses in interpolation cycle of robot (~10ms)
Download additional information

Q-GAGE3D [EN]
- Filename
- mvs-sfa-fl-qgage3d-en-2025-02.pdf
- Size
- 980 KB
- Format
Automated car body paint inspection – Control paintshop costs with confidence

Undetected defects and inefficient rework are among the biggest cost drivers in modern paintshops. Facelifts or model changes increase the complexity of quality inspections, while the pressure to maintain production stability remains high.
Car Paint Vision keeps you in control with AI-powered, high-speed surface inspection that detects paint defects reliably and precisely. This ensures consistent paint quality across all body types, colors, and model variants, while significantly streamlining rework and reducing warranty claims.
Even at fast cycle times, the system keeps up with production speed without compromising detection accuracy.
It easily adapts to new geometries and color changes – making it ideal for model changes, facelifts, and evolving production demands.
Seamlessly integrated into stop & go and moving line operations, Car Paint Vision requires a minimal number of robots. With precise defect localization and clear visualization, Car Paint Vision streamlines both automated and manual repairs. This reduces labor and costly rework.
Its built-in data analytics supports continuous process optimization, giving you the tools to maintain quality consistency while improving efficiency. By ensuring quality and flexibility while minimizing slip errors, Car Paint Vision delivers a measurable cost advantage.
Benefits
- Consistent paint quality across all models, variants, and colors
- Significantly lower claims through minimal error slip
- Future-proof: Flexible adaption to model changes and facelifts
- Supports fast cycle times without compromising inspection quality
- Reduced labor costs through efficient automated and manual repairs enabled by accurate defect localization and visualization
- Lean robot setup and efficient integration
- Sustainable process control – continuous improvement through integrated analytics and AI
- Features
- Typical defects
- Technical data
- Superior inspection technology: Combines multiple illumination methods and defect views with advanced AI-based detection
- Maximum coverage up to ≥ 99% through optimal sensor-to-car body alignment
- Fastest robot-based inspection system: Robot speed up to 1,200 mm/s, optimized for both moving line and stop-&-go operations
- Lean setup: Requires the smallest number of robots for full inspection coverage
- Fastest integration: Powered by digital twin technology, sensor simulation, and full AI support
- Defect visualization for rework: Available via optional laser marking unit or monitor visualization
- Built-in process analytics: Continuous process improvements through real-time data and insights
- Supports top-coat, primer, and E-coat inspections: Comprehensive quality control
- Paint runners
- Inclusions
- Shallow Crater
- Pinhole Crater
- Dent
- Bump
- Boilers
- Scratches
Paintscan Hybrid X (other variants available)
- Max. robot speed: 1,200 mm/s
- Scan frequency: 480 Hz
- JPH with 2 robots: Typ. 50 – 60
- JPH with 3 robots: Typ. 60 – 70
- Vibration tolerant: Yes
- Station: min. width / length: 5 m / 6.5 m
- Conveyor modes: Moving line, stop & go
Download additional information

Car Paint Vision [EN]
- Filename
- mvs-sfa-fl-cpv-en-2025-05-web.pdf
- Size
- 908 KB
- Format

Car Paint Vision [DE]
- Filename
- mvs-sfa-fl-cpv-de-2025-06_web.pdf
- Size
- 755 KB
- Format
Painted add-on part inspection
Painted add-on parts must meet stringent quality standards. However, the manual inspection of painted bumpers, spoilers and cover panels carries the risk of subjective assessments and errors – leading to quality deviations, high rework costs and, in the worst case, costly warranty claims.
The automated inspection solution from ISRA VISION uses high-precision, robot-guided sensors to inspect painted add-on parts and detect even the finest paint defects. Objective evaluation according to OEM specifications and relevance ensures that all quality requirements are met. Injection moulders, painters, surface finishers and OEMs benefit from consistently high surface quality, which is ensured efficiently and cost-effectively.
Benefits
- Meeting global quality standards: Consistent paint quality with high-performance inspection
- Flexible & easy handling: Compact hardware for simplified set up and great coverage
- Cost optimization for fast ROI: High degree of automation
- Features
- Typical defects
- Technical data
- Multi-mode LED line: High detection and classification performance
- Continuous scanning: 800 mm/sec movement
- Compact design: for maximum component coverage of up to 98 %
- Highest inspection performance with AI-based system:
- ≥ 98.5 % detection rate
- ≥ 90 % classification rate for typical defects
- < 1 % pseudo errors
- Inclusions
- Craters
- Max. robot speed: 800 mm/s
- Scan frequency: 320 Hz
- Operating distance / Standoff: 135 mm
- FOV: 130 × 40 × 35 mm³
- Cameras: 2
- Camera resolution: 0.08 mm/pix
- Dimensions: 350 × 220 × 120 mm³
- Weight: Approx. 5.5 kg
Download additional information
- English
- German

Painted Part Vision [EN]
- Filename
- mvs-sfa-fl-painted-part-vision-en-2025-01-web.pdf
- Size
- 814 KB
- Format
 asdf
asdf
Painted Part Vision [DE]
- Filename
- mvs-sfa-fl-painted-part-vision-de-2025-01.pdf
- Size
- 815 KB
- Format


